Key Takeaway
In a DIY kitchen remodel, you can safely handle painting, cabinet hardware, backsplash tile, floating floors, and limited demolition yourself, but electrical work, plumbing, gas lines, structural changes, and stone countertop installation should always go to licensed professionals. Sorting every task into cosmetic, finish, system, or structural categories makes the decision straightforward. Many homeowners save the most money by combining DIY prep and finish work with professional help on permitted trades.
You can usually handle the lower-risk, cosmetic parts of a kitchen remodel yourself. Painting, swapping cabinet hardware, organizing drawers, some backsplash work, limited demolition, and finish updates are all within reach if you have the time, the right tools, and a little patience. What you shouldn’t touch on your own is electrical work, plumbing, gas lines, structural changes, range-hood venting, or anything that disturbs hazardous materials, unless you’re properly qualified and your local building department signs off.
Here’s the part most people don’t hear enough: DIY projects and professional remodeling aren’t an either-or choice. You can roll up your sleeves and stay close to the work while a licensed team handles the pieces that protect your home. Your vision still leads the whole project. This step by step guide walks through what belongs in your hands, what belongs to a pro, and how to combine both without turning your kitchen remodel into a stressful mess.
The Real Question Isn’t “Can I?” — It’s “Cosmetic, Finish, System, or Structural?”

Whether you can technically do a task matters less than which category it falls into. Sort every job on your list into one of four tiers, and the DIY-or-pro decision gets a lot clearer.
- Cosmetic: Paint, cabinet hardware, drawer organizers, decor. Usually DIY-friendly.
- Finish work: Backsplash tile, cabinet refinishing, floating floors, counter tops that aren’t stone. Maybe DIY if you’re genuinely skilled and patient.
- System work: Electrical work, plumbing, gas lines, mechanical ventilation, new appliances that need wiring or venting. Call a pro.
- Structural: Removing or moving walls, windows, doors, anything load-bearing. Call a pro, and expect engineering review and permits.
There’s a fifth flag that sits over all of them: older-home hazards. If your house predates 1978, or you’re unsure of its age, stop and test before you disturb anything.
The smarter way to weigh a task isn’t skill alone. It’s skill plus permits, safety, liability, sequencing, warranty, and finish quality. A job you’re capable of doing might still trigger an inspection, void an appliance warranty, or throw off the whole schedule if it happens in the wrong order. And a professional-looking result often comes down to precise tools and precise measurements. Measuring your kitchen accurately, before you buy a single thing, is one of the most important steps you can take. That single habit protects your money more than almost any other, because most costly DIY mistakes trace back to a wrong dimension written down early.
Quick DIY vs. Pro Kitchen Remodel Matrix
Here’s a fast reference for the most common kitchen remodel tasks. Details for each follow below.
| Task | DIY-friendly? | Why / risk | Permit or pro trigger |
|---|---|---|---|
| Painting walls, ceilings, cabinets | Yes | Low risk, high impact | Usually none |
| Cabinet hardware | Yes | Simple, forgiving | None |
| Cabinet refacing/refinishing | Maybe | Prep and precision matter | None |
| Backsplash tile | Maybe | Beginner-friendly but detail-heavy | None |
| Floating floor install | Maybe | Doable; can stretch timelines | None |
| Limited demolition | Maybe | Hidden hazards, utilities | Check for lead/asbestos |
| Cabinet installation | Maybe | Out-of-level cabinets ruin countertops | None, but precision required |
| Countertops (stone/quartz) | No | Heavy, exact fabrication needed | Pro fabrication and install |
| Sink/faucet relocation | No | Hidden leaks, water damage | Plumbing permit likely |
| Dishwasher/disposal hookup | No | Electrical and drainage rules | Permit often required |
| Lighting changes | No | Shock, code compliance | Electrical permit |
| Outlets/new circuits | No | Fire and shock risk | Electrical permit |
| Range hood venting | No | Duct clearances, exterior termination | Mechanical permit likely |
| Wall removal | No | Structural, load-bearing risk | Plan review and permit |
| Gas work | No | Explosion and leak risk | Licensed pro required |
| Lead/asbestos demo | No | Serious health hazard | Certified professional |
DIY Kitchen Remodel: What You Can and Shouldn’t Do Yourself
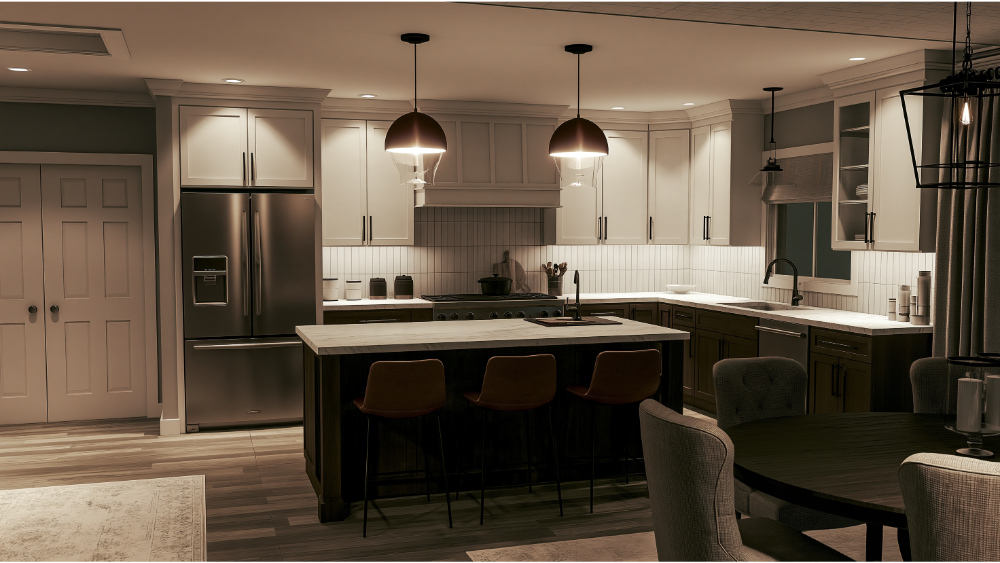
This is where you get to stay hands-on and save money on labor. None of these tasks put your home’s systems or safety at risk, and they’re a genuine part of the transformation.
Planning, inspiration, and measuring. Before anyone touches a wall, you can gather ideas, build a look you love, and measure your space carefully. Accurate measurements are the foundation for everything that follows, from cabinet orders to appliance fit. Get this right and you avoid the most common (and expensive) DIY kitchen remodel mistake: buying the wrong size. Note the depth your new appliances need, the swing of a dishwasher door, and the width your range demands, then check those numbers against your cabinet layout twice. A laser level makes this kind of work far more accurate than a tape measure alone.
Decluttering and a temporary kitchen. Clearing out cabinets and drawers and setting up a small temporary kitchen, a microwave, a coffee station, a corner for dishes, is entirely on you. A hot plate and a plastic tub for washing dishes keep daily life livable while work happens, and moving your everyday routine into the dining room for a few weeks helps too.
Painting walls, ceilings, and cabinets. A fresh coat updates a kitchen remodel dramatically without spending much money. Cover your surfaces with drop cloths and plastic sheeting, mask edges with painter’s tape, and take your time on the cabinet doors especially. Painting cabinets rewards patience: light coats, proper drying time, and clean prep separate a crisp finish from a gummy one. Glossy surfaces need extra sanding so the new paint grips. Number your doors and drawers as you remove them so every piece goes back exactly where it started.
Hardware and organizers. Swapping knobs and pulls is one of the easiest upgrades in the whole project, and hardware stores stock plenty of styles to match your look. Adding drawer organizers, pull-outs, and shelf inserts inside your cabinets is just as approachable and makes the kitchen feel custom. Lining the interiors of upper cabinets with fresh shelf liner is another small, satisfying task that costs almost no money. Swapping a few doors for open shelving, which has been all the rage lately, is another approachable way to change the feel of the room.
Material selection. Choosing your counter tops, tile, cabinet finishes, and flooring is where your taste shapes the room. This is far easier when you can see and touch materials in person. In our Sacramento showroom, you can compare slabs and tile finishes side by side and get a real sense of how they’ll live in your home, so the choices you make reflect exactly what you pictured. Bringing a paint chip or a cabinet door sample along helps you judge how a countertop and backsplash tile read together in real light.
The right tools and a bit of patience are what carry these jobs from “fine” to “looks professional.” Slow down where it counts.
Kitchen Cabinets and Other Tasks That Might Be DIY — If You Have the Skills
This is the honest middle ground. Plenty of homeowners pull these off well. Plenty also underestimate them and end up calling for help partway through. Go in clear-eyed.
Limited demolition. Pulling out old cabinets or a laminate counter can save money on labor. But shut off the relevant utilities first, and confirm you’re not disturbing anything hazardous (more on that below). Demo is also where hidden surprises show up, so go slowly and stop if something looks off. Unscrewing upper and lower cabinets from the wall studs is safer with a helper holding the weight, since a full run can be heavier than it looks.
Cabinet painting or refinishing. A step up from wall paint. Good results on kitchen cabinets depend on thorough sanding, clean surfaces, and the right primer and topcoat. Older boxes made of particle board can chip or swell if they get wet during prep, so handle them gently. Rushed prep is the usual failure point, and it shows most on the flat faces of doors and drawers.
Floating floor installation. Click-together flooring installation is one of the more DIY-accessible upgrades. It’s forgiving compared to glued or nailed floors, though it can stretch your timeline if you’re learning as you go. Let the planks acclimate in the room for a day or two so they don’t buckle after they’re down.
Backsplash tile. Beginner-friendly, but detail-heavy. Straight lines, even spacing, and clean grout lines take a steady hand. Dry-lay a row of tile first to plan your cuts around outlets and the ends of your run. Cutting tiles cleanly around outlets and corners is where a rented tile saw earns its keep. If you’re patient and willing to redo a crooked row, this is a satisfying project that saves real money.
Stock or RTA cabinet installation. Installing kitchen cabinets is doable with the right tools, a level, and a helper. Here’s the catch: cabinets set even slightly out of level cause misaligned countertops down the line. A quarter-inch error at the base becomes a visible gap at the top. Hang your upper cabinets from solid studs, not just drywall, and shim as you go. This is precision work disguised as assembly.
Simple appliance swaps. Replacing a fridge or a freestanding range with the same fuel type and connection can be a DIY task, as long as you’re not touching gas lines, wiring, venting, or plumbing. Slotting new appliances into an existing hookup is one thing, and pulling out old appliances of the same type is straightforward. The moment any of those systems come into play, it moves to the pro column. Swapping small appliances in and out is never a concern.
Across all of these, the right tools and real precision are what separate a professional finish from an amateur one.
Electrical Work, Gas Lines, and Other Tasks You Should Never DIY

These jobs carry real safety, code, and liability weight. They almost always require permits and inspection, and mistakes here get expensive fast.
Electrical work. New circuits, relocated outlets, added lighting, panel changes. Errors in your electrical system can cause fires or thousands of dollars in damage, and kitchen circuits carry strict requirements, including dedicated lines for many new appliances. Adding new outlets and swapping light fixtures may look simple, but a licensed electrician working under permit keeps you safe and compliant.
Plumbing. Relocating a sink, connecting a dishwasher or disposal, or changing drain and vent lines. Plumbing mistakes tend to hide, then surface as slow leaks and extensive water damage behind finished walls and cabinets. Not worth the gamble.
Gas work. Any gas line adjustment belongs to a licensed professional, full stop. If you’re switching to a gas range or moving one, the gas lines have to be handled by a pro. The risk of a leak is too serious for a home project.
Structural changes. Removing or moving a wall, window, or door, especially anything load-bearing, requires engineering review and permits. Guessing wrong about what’s holding up your house is a mistake you can’t undo cheaply.
Range hood venting. Exhaust ducting has to terminate to the exterior with specific clearances, and the wrong duct material or routing fails inspection. This is a mechanical job for a pro, and it matters more once you add powerful new appliances that move a lot of air.
Stone and quartz countertops. These slabs are heavy and demand exact fabrication. A template that’s off by a hair leaves a gap you’ll see every day. In our own cabinet shop and countertop fabrication shop, we cut and finish each piece to fit your kitchen precisely, so the seams and edges land where they should. This is one place where hiring professionals almost always delivers a higher quality result than a weekend attempt.
Hazardous-material work. Anything involving lead paint or asbestos in an older home belongs to certified professionals, covered next.
Hiring a pro for these isn’t about giving up control. It’s about keeping the parts of your home that matter most in accountable hands.
Sacramento and California Permit Realities Before Work Begins
This is where local rules change your plan. In Sacramento, cosmetic and finish work often doesn’t need a permit, but system and structural work usually does.
According to the City of Sacramento, finish work like painting, tiling, carpeting, cabinets, and countertops may be exempt from permit requirements. The distinction that trips people up: related work, such as relocating an electrical fixture to make room for new cabinets or counter tops, can still require a building permit. So the tile itself may be fine, while moving the outlet behind it is not.
Non-structural residential kitchen remodels in Sacramento are handled as minor permits. The moment you add, move, remove, or alter a wall, window, or door, the project shifts into structural territory and requires plan review. The city’s remodel questionnaire even asks directly whether your project includes plumbing relocation, lighting relocation, appliance relocation, repiping, rewiring, or wall changes, a useful checklist for deciding what triggers oversight. If your plan involves new appliances that need a moved outlet or a gas connection, that’s your answer right there. Changing the current layout of your existing kitchen almost always tips a project into this category.
Timing matters too. The 2025 California Building Standards Code took effect January 1, 2026, so any permitted kitchen work now follows the current code cycle, including energy requirements for lighting and ventilation. Starting work before your permit is issued can bring penalties, and skipping permits altogether tends to surface later when you sell, since unpermitted work raises red flags for buyers and appraisers.
One more thing worth knowing: in California, home improvement work valued at $500 or more must be performed by a contractor licensed through the Contractors State License Board. Always confirm the specifics with your city or county building department before work begins, because requirements vary by jurisdiction and by the exact scope of your project.
Older Sacramento Homes: Lead and Asbestos Cautions Before Demo
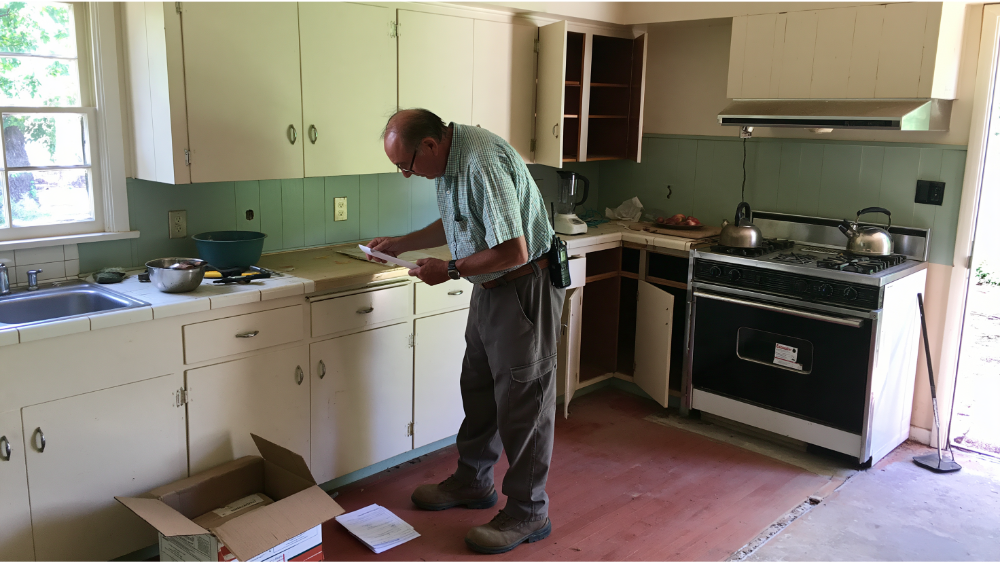
If your home has some age on it, stop before you swing the hammer. This is the safety layer national DIY guides tend to skip, and it’s genuinely important.
Homes built before 1978 may contain lead-based paint. Under the EPA’s Renovation, Repair and Painting Rule, disturbing painted surfaces in pre-1978 housing is regulated work when a firm is paid to do it. Demolition and window replacement are always covered, no matter how small the area. The rule generally doesn’t apply to homeowners working in their own home, but the EPA still strongly recommends lead-safe practices and, if you’re unsure of your home’s age, assuming lead is present and acting accordingly. Sanding old kitchen cabinets or scraping painted trim can release lead dust, so this applies to more than just walls. Hiring a certified lead inspector to test surfaces first is the safest route.
Then there’s flooring. The OSHA standard treats asphalt and vinyl flooring installed in 1980 or earlier as asbestos-containing unless testing proves otherwise. The same caution applies to old asphalt shingles and roofing debris that sometimes turn up during demo. That’s directly relevant when you’re pulling up an old kitchen floor before new flooring installation. Asbestos fibers release when material is cut, torn, sanded, scraped, or demolished.
The rule of thumb from the EPA is simple: don’t disturb suspected hazardous material. Improper sampling can be more dangerous than leaving it alone, so testing and any removal should go to a trained, accredited professional. Don’t sand, scrape, cut, or demo anything you can’t identify. It’s a calm, practical precaution, not a reason to panic.
How to Combine DIY Projects and Professional Work Without Costly Mistakes
Staying involved doesn’t mean doing everything yourself. The homeowners who blend DIY projects with professional help most smoothly are the ones who plan the overlap carefully. Here’s how to keep it clean and avoid costly mistakes.
Agree on scope before work begins. Decide up front which tasks are yours and which belong to the crew. Ambiguity is where budgets and schedules unravel.
Put your DIY tasks in writing. California requires a written contract for home improvement projects over $500, and the CSLB advises that the contract spell out the work, materials, payment schedule, and who is responsible for permits. A good contractor will name your DIY portions there too, so nobody double-does or skips a step.
Clarify who pulls permits. This should be settled in the contract, not assumed. A clear answer here prevents a stalled project later.
Sequence around inspections. This is the big one. Never install finishes, tile, flooring, or cabinets, before rough electrical, plumbing, and mechanical inspections pass. If you tile over a wall that hasn’t been inspected, you may have to tear it back out. Do your DIY work in the right window, either early prep like demo and painting, or the finish tile after the inspected rough-in is signed off.
Don’t buy materials that conflict. Before you spend the money, confirm your selections work with code clearances, ventilation requirements, and exact cabinet measurements. A beautiful range hood that violates duct clearance, kitchen cabinets ordered to the wrong dimension, or new appliances that don’t fit the opening all become expensive returns. Small mistakes here add up quickly.
Your vision still leads the whole thing. A transparent partner keeps timelines and costs upfront so there are no surprises. Because we use our own in-house team and never outsource your project to third parties, you always know exactly who’s in your home and who’s accountable for the work.
When to Stop and Call a Professional Immediately

Some discoveries mean you put the tools down and pick up the phone. Stop right away if you find:
- Knob-and-tube or aluminum wiring, or ungrounded outlets
- Water damage or mold behind cabinets or walls
- Unknown flooring adhesive or mastic
- Exposed gas lines
- Sagging floors or cracked framing
- A wall you suspect is load-bearing
- Signs of unpermitted work from a previous owner
Also bring in a professional from the start when you’re changing the layout, when the work needs a permit, or when you want custom countertops or cabinetry that has to fit exactly. Electrical shortcuts cause fires, structural guesses require engineering, and hidden conditions have a way of becoming the most costly mistakes in a remodel. For first-time owners tackling their first house, calling early protects your home and the money you’re putting into it.
What a Realistic Budget and Contingency Look Like
A well-planned budget is what separates a smooth kitchen renovation from a financial headache. As a general national reference for planning, many full remodels start somewhere around $10,000 to $15,000, though the real figure depends heavily on your scope, materials, cabinets, and layout. New appliances and stone counter tops can move that number quickly, and expanding into other rooms or a whole house project changes the math entirely. Use it only as a rough starting point, not a quote.
Whatever number you land on, build in a contingency of 10 to 20 percent for surprises, because older homes especially tend to reveal hidden conditions once walls open up. Deciding which tasks you’ll DIY can trim labor costs and save money, but be honest about where a mistake might cost more to fix than it saved. One of the key reasons homeowners blow past budget is doing system work they weren’t ready for, then paying a pro to redo it. Some upgrades, like a leveling compound to flatten a floor before new planks go down, are cheap must-haves that prevent bigger problems later. The goal is a budget that holds up when reality arrives, not one that looks good on paper and falls apart on day three. For an accurate picture of your specific project, a detailed estimate beats any general range.