Key Takeaway
Kitchen remodel photos are most useful when they show the layout, cabinets, countertops, lighting, and traffic flow transformed around how homeowners actually live, not just a polished finish. A cosmetic refresh inside the existing footprint can deliver 80% of the visual impact for a fraction of the disruption. Cabinets typically account for close to 40% of total project cost, and budgets commonly run 25% past the first estimate. Bring 10 to 15 focused images to a consultation so a remodeler can confirm what is buildable in your specific room.
Kitchen remodel photos are most useful when they show more than a pretty finish. Look for real before-and-after remodeling projects that reveal how the layout, cabinets, countertops, backsplash, flooring, lighting, and traffic flow were transformed around the way the homeowners actually live. A photo of a beautiful island means very little until you know what was there before it, and why the change made the space easier to cook in.
If you have a folder of saved kitchens on your phone and no idea which ones could work in your room, this is for you. We’ll walk through how to read a photo the way a remodeler reads it, what images can never tell you, and how to turn a scattered collection of screenshots into a plan. Two ideas will come up throughout: a cosmetic refresh that stays inside your existing footprint, and a layout change that moves walls, plumbing, or electrical. And buildable, meaning whether an image can actually be reproduced in your room, in your house, under current code.
What Should You Look For in Kitchen Remodel Photos?
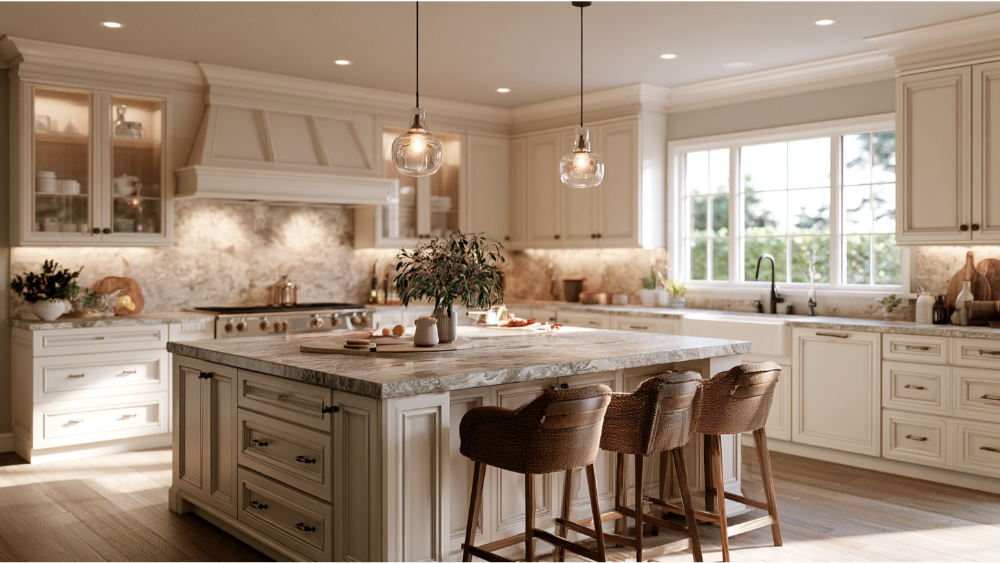
Most people look at a photo and react to color. Train yourself to look at six layers instead:
- Layout and traffic. Where does a person walk, and does anyone have to cross the cook’s path to get a glass of water?
- Cabinet storage. Count the drawers. Notice whether the cabinets run to the ceiling or stop short and collect dust.
- Work surfaces. Is there real, uninterrupted counter space beside the range and the sink, or just decorative runs of stone?
- Lighting. Look for more than one source: recessed overhead, something under the upper cabinets, and a decorative fixture with a job to do.
- Flooring and continuity. Does the floor stop at the kitchen doorway, or carry into the next room? That single decision changes how big a space reads.
- Personal style. Clean lines, smart storage, and mixed materials show up in almost every current kitchen design. The question is whether the room looks like you or like a showroom.
A photo is a question, not an answer. It tells you what you’re drawn to. It cannot tell you whether the room is functional, or whether any of it fits your house.
Cosmetic Refresh or Full Renovations? Reading Scope in Kitchen Remodel Photos
Two kitchen remodel photos can look nearly identical and represent completely different projects. One kept the sink, range, and refrigerator exactly where they were and simply upgraded cabinets, countertops, backsplash, and flooring. The other was a full gut renovation that moved a wall, rerouted plumbing, and rebuilt the ceiling. The finished images look like cousins. The permits, the timelines, and the costs do not.
So when you save an image, guess at the scope behind it. Are the windows in the same place as the old ones? Is the range still on an exterior wall where a hood can vent? Does the ceiling look original, or newly framed and patched? Full renovations that relocate utilities and open up a space create the biggest emotional payoff in photos, which is exactly why homeowners underestimate what they involve. Cosmetic renovations can deliver 80% of the feeling for a fraction of the disruption when the existing layout is already sound.
We’ll tell you which one your photos are pointing toward, and we’ll tell you if your current layout is already working harder than you think.
Real Kitchen Remodel Photos Start With the Problem, Not the Trend
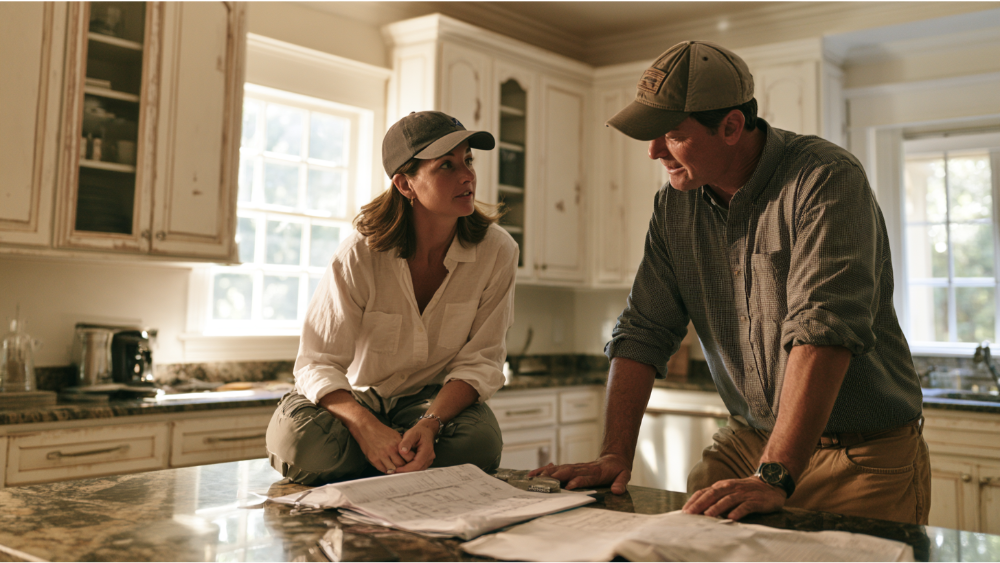
Every project photo in our gallery started with something that wasn’t working. That’s the part most galleries skip, and it’s the part you need. When you look at any remodeling company’s work, ask for six pieces of information per project:
- The before problem: dark room, nowhere to put the mixer, a peninsula everyone bumped into.
- The homeowner’s vision: what they said they wanted the space to feel like.
- The design decision: taller cabinets, a relocated range, a custom countertop.
- The visible result: what you’re actually seeing in the frame.
- The daily-life benefit: two people can cook now without shuffling around each other.
- The project note: whether the work stayed in the existing footprint or utilities moved.
Be skeptical of galleries full of glossy imagery with no project detail behind it. If nobody can tell you what was there before, or what the crew actually built versus what came pre-assembled, the photo is decoration. Our kitchen remodel photos are our own work, photographed in real Sacramento-area homes, and we’re happy to walk you through any project in it.
Dark and Dated to Bright and Welcoming: Reading a Kitchen Transformation
The brightest “after” photos you save are almost never the result of one change. Lighter cabinet finishes help. So do under-cabinet lighting, a backsplash that bounces natural light back into the space, clear counters, and the simple fact that the photographer opened the blinds and shot from the doorway with a wide lens.
We’d rather tell you that than let you believe paint alone did it. If your kitchen has one small window and heavy soffits, a lighter cabinet color will help, but the lighting plan and the placement of the cabinets will do more. Removing a soffit to run the upper cabinets to the ceiling often changes a room more than any finish decision in the whole kitchen remodel.
Worth noticing in current work: the industry has moved away from stark white. Warm white oak, creamy stones, and warmer neutral cabinets are where most designers are pointing, and wood tones read as more inviting in person than a cool white does.
Kitchen Layout Photos: How the Work Triangle Changes Everything
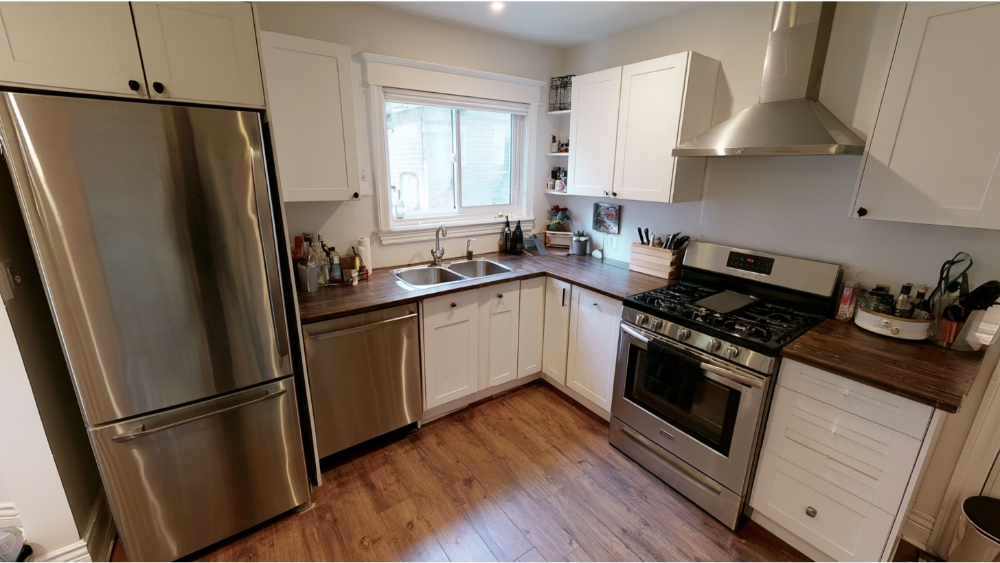
Here’s a habit that will change how you look at every photo you save. Find the sink, the range, and the refrigerator, then trace the path between them with your finger. That work triangle is the usability backbone of the room. As a rough guideline, the three legs added together should land somewhere between 13 and 26 feet. Much shorter and the space feels cramped with two people in it. Much longer and you’re walking laps to make dinner.
Then look at clearances. Where does the dishwasher door land when it’s open, and does it block the sink? Can someone pass behind a person standing at the island? Islands have gotten bigger, with roughly 40% of homeowners now choosing one 7 feet or longer, and a large island in a small space can quietly ruin circulation no matter how good it looks in a photo. Seating changes the math too, since guests naturally gather at the overhang and stay there.
The transformations that feel most dramatic usually involve removing a peninsula, resizing an island, relocating appliances, or opening the kitchen toward a dining space. “Broken-plan” designs are gaining ground too: partial separation instead of one vast open room. If a photo shows a range in the middle of an island, look for the downdraft or the ceiling hood, because venting drives that decision more than aesthetics do.
The honest caveat: a photo cannot tell you whether a wall is load-bearing, where the gas line runs, or whether plumbing for a relocated sink can be moved without tearing into a slab. That takes a site visit, structural review, and permits.
Small Kitchen Ideas: Photos of Smaller Kitchens That Make Tight Spaces Work
Plenty of Sacramento-area homes have smaller kitchens with one doorway, one window, and a hard ceiling on what’s possible. When you look at photos of smaller kitchens, look for these things specifically:
- Cabinets that run to the ceiling instead of stopping at 42 inches
- Deep drawers in the base cabinets rather than doors with fixed shelves behind them
- Counter-depth or compact appliances that sit flush with the cabinet run
- A galley layout, which handles tight spaces better than any forced island
- A single-bowl sink, which gives you more usable basin in less counter
- Flooring that continues into the adjoining room with no threshold strip
- One short run of open shelving for warmth, not an entire wall of it
- Compact seating: a two-stool overhang or a banquette tucked into a corner
- Integrated, hidden storage so the countertops stay clear
Three things make a small room feel bigger: vertical storage, continuous flooring, and clear counters. Square footage is rarely the real problem in smaller kitchens, and unused vertical space almost always is. Large appliances can swallow a modest footprint, which is why counter-depth models show up in so many of these photos. The best small kitchen ideas take storage up and tuck it away, so the room feels calm even when it’s working hard.
Cabinet Doors, Wood Tones, and Storage That Actually Works
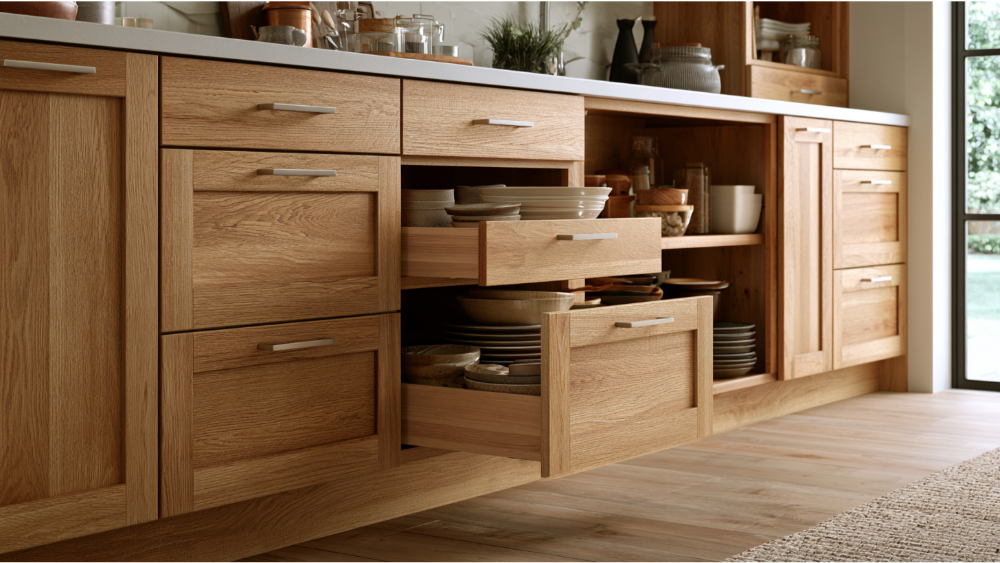
Sort your cabinet photos into comparisons instead of a pile. Painted versus natural wood. Classic Shaker versus slab or flat panel cabinet doors. One tone versus two. Standard height versus full-height to the ceiling. When you see the same choice four times in your own saved images, you’ve learned something about your taste, and that narrows your focus before you ever pick a finish.
Current direction, for what it’s worth: about 69% of professionals report slab doors gaining ground on traditional profiles, and wood grain finishes have overtaken painted ones. Natural white oak and walnut give a space an organic feel, and rift-sawn wood grain running vertically on flat panel cabinets reads quieter than a busy figure. Frosted glass fronts show up in more modern kitchens, and deep olive greens and muted indigo blues are being used the way neutrals used to be.
None of that is visible in the part that matters most. Photos show door fronts. They don’t show pull-out interiors, drawer dividers, a corner solution that makes a blind cabinet usable, or a tray for sheet pans beside the oven. Cabinets typically account for close to 40% of a kitchen remodel, which is exactly why they deserve the most of your study time and the most of your designer’s attention.
We plan custom cabinetry around your routines first: where groceries land, where the coffee happens, where the kids reach for their own cups, and which appliances need to be within a step of the counter. The door style is the last decision, not the first.
Quartz Countertops, Backsplash Details, and the Flawless Finish Work
Zoom in. Close-ups tell you more about craftsmanship than any wide shot. Look at where the countertop seam falls and whether it was placed somewhere sensible. Look at the edge profile. Look at how the counter meets the backsplash, whether the tile is aligned at outlets and corners, and whether the grout lines stay consistent across the whole run. Check the reveal where the cabinets meet the countertops, and whether the sink is undermounted cleanly.
Countertop tone drives the entire palette, and a photo flattens it. Veining reads differently at full slab scale than it does in a 4-inch sample, and gloss level barely photographs at all. Natural quartzite now sits near the top of designer preference at around 62%, and roughly 75% say slab backsplashes are gaining popularity, where a single piece of stone continues up the wall and puts the material center stage instead of tile. Granite and marble still earn their place, and quartz countertops remain a workhorse for families who cook every night. A waterfall edge island, where the stone runs down the side to the floor, photographs beautifully and uses more slab than people expect. Mixed materials and finishes, like a warm metal faucet against cool stone, add depth when they’re chosen together rather than one at a time.
This is why we keep a showroom and our own countertop fabrication shop on site. You can see full slabs next to your cabinet door and flooring samples under real light, and our fabricators plan seams, edges, and slab layout for your specific countertops rather than sending the job out and hoping.
Flooring, Lighting, and Kitchen Decor: The Layers Photos Undersell
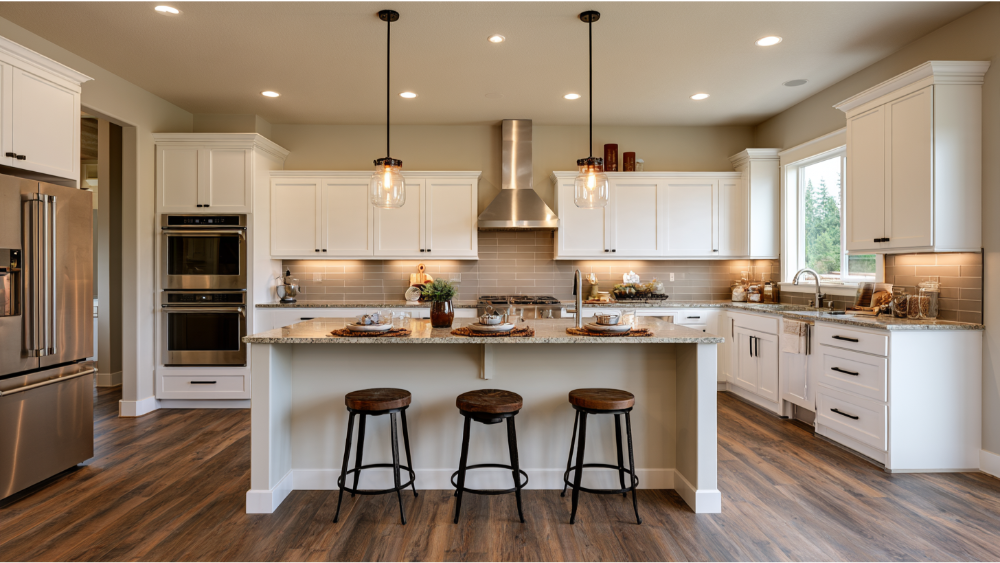
Flooring that runs continuously from the kitchen into the adjoining rooms makes both spaces read larger, and it’s one of the easiest shortcuts to skip. Tone matters as much as material: a warmer wood floor pulls warmth out of white oak cabinets, while a cooler gray floor can make the same cabinets look flat.
Lighting works in three layers plus daylight. Recessed fixtures handle the room. Under-cabinet lighting handles the countertops. Pendants and decorative light fixtures handle the mood and mark a gathering point. Here’s the tell: look at the counters in any photo. If they’re sitting in shadow, task lighting was an afterthought.
Kitchen decor is the last layer and the one photographers stage hardest. Strip it out mentally. Remove the styled bowl of lemons and the folded linen, and ask whether the space still holds up. If it does, the bones are good. If it doesn’t, you were sold props. Because our own craftsmen handle cabinets, countertops, tile, and flooring, those layers get planned as one kitchen remodel instead of three trades guessing at each other’s work.
Modern Kitchen Remodel Photos: What Today’s Kitchen Design Ideas Have in Common
Scroll enough modern kitchen remodel photos and the same through-lines appear. Contemporary minimalism softened by natural wood, often a wood island anchoring the room. Storage tucked away so the sightlines stay quiet. Appliances panel-fronted or recessed so they stop competing with the cabinets. Zones that separate cooking, prep, and gathering without walls. Decor kept sparse and personal, a few pieces that mean something rather than styled props. And a real connection to outdoor space, which pays off in the Sacramento climate, where the doors are open half the year.
Trends date. The kitchens people still love ten years later are the ones that look like the family living in them. Use modern imagery as inspiration for how a space should feel, not as a template to copy line for line.
What Kitchen Remodel Photos Don’t Show
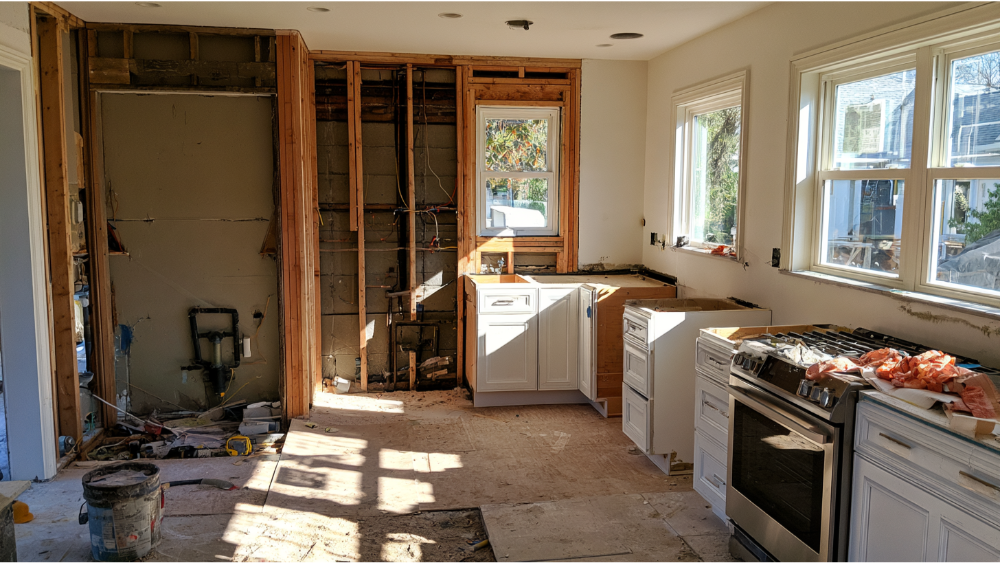
This is the part no gallery will tell you. No image can reveal:
- Structural conditions behind the walls
- Where plumbing, gas, and electrical actually run
- How well the ventilation performs
- What permits the remodeling work required
- True room dimensions and ceiling height
- Whether an appliance door hits an island or a cabinet
- How materials behave after five years of cooking
- The construction sequence and what living through it looked like
- Whether the image was digitally altered or generated entirely
Ventilation deserves its own mention, because it never photographs as a safety decision. NFPA’s 2017 to 2021 analysis found cooking caused 44% of reported home fires, with ranges and cooktops involved in 53% of cooking fires and 88% of cooking-fire deaths. Where the stove sits, and what the hood above it can actually move, matters more than how the hood looks. Under the California Energy Commission’s current compliance guidance, a qualifying range hood must have at least one setting delivering 100 CFM or more at 3 sones or less, and the specific airflow requirement can depend on the size of the dwelling and whether the range is gas or electric.
How Do You Turn Saved Photos Into a Kitchen Design Plan?
Sort your collection into five groups: layout, cabinets, countertops and backsplash, flooring, and lighting and hardware. Then go through each photo and mark the one element you actually want from it. Most saved images contain a single good idea surrounded by things you don’t care about, and naming that idea is what turns a mood board into a brief.
Next, split must-haves from nice-to-haves. Be honest about which is which. A second sink is a nice-to-have. Enough landing space beside the oven is not. Then bring the whole collection to a design consultation, where someone can tell you what translates to your room and which ideas are fighting each other.
One honest note about money. Industry-wide, kitchen renovations commonly run about 25% past the number a homeowner first had in mind, and the return typically recovers somewhere around 50% to 60% of the investment. That drift usually comes from decisions made mid-project without clear pricing. It’s why we put upfront timelines and costs in writing before any work begins.
A Sacramento Planning Note: Permits, Older Homes, and Licensing

If your home is inside city limits, the City of Sacramento handles your permit. Outside it, Sacramento County does. Either way, scope drives the review. The City’s nonstructural kitchen remodel category covers things like cabinet and counter replacement, fixture and lighting relocation, and rewiring, but it specifically does not cover removing walls or creating and enlarging openings in load-bearing walls. That work follows the residential remodel process. Sacramento County’s simple remodel checklist asks for a dimensioned floor plan showing appliances, plumbing fixtures, receptacles, lighting, and ceiling heights.
Current code matters too: the 2025 California Building Standards Code (Title 24) took effect January 1, 2026.
Plenty of homes around Sacramento predate 1978, which brings the EPA’s Renovation, Repair and Painting Rule into play when a paid contractor disturbs painted surfaces. The minor-repair exemption is generally limited to 6 square feet indoors or 20 square feet outdoors, and window replacement stays covered regardless.
On hiring: the CSLB requires a written contract for home-improvement work over $500 and caps the down payment at $1,000 or 10% of the contract price, whichever is less. Licensed contractors generally carry a $25,000 license bond, though CSLB notes the bond isn’t a guarantee of competence. Verify any contractor’s license and workers’ compensation before you sign. Ours is CA Contractor License #793440.
Why Real Project Photos Matter When You Choose a Remodeler
When you’re evaluating a remodeling company’s gallery, look for:
- Several angles from the same project, not one hero shot
- Before, during, and after documentation
- Close-ups of finish work: cabinet alignment, tile transitions, countertop seams
- Consistent workmanship across multiple kitchens, not one standout
- Clear descriptions of what the company itself completed
- A physical local address you can walk into
- A license number you can verify
We’re family-owned and proudly rooted in Sacramento, and we don’t outsource your project to third parties. Our own craftsmen do the work, which means one team is accountable for what happens inside your home from demolition to the final punch list. Our showroom and countertop fabrication shop are on site at 4815 Auburn Blvd, and you’re welcome to see both. By our own count, we’ve brought 20+ years of experience and 700+ happy clients to this work, with a self-reported 4.9 out of 5 rating on our site.
Frequently Asked Questions
What is a realistic budget for a kitchen remodel?
Scope drives it more than anything else: a cosmetic refresh inside your existing footprint and full renovations that move walls and utilities are different projects. Cabinets are usually the single largest share at roughly 40%, and industry-wide, kitchen remodeling projects commonly run about 25% past a homeowner’s first number. For real figures on your kitchen, request a free, no-obligation estimate.
Can I take a picture of my kitchen and redesign it?
Yes, and photos and kitchen design apps are a great way to communicate a direction. They just can’t account for structure, utility routes, appliance clearances, or code. Bring your kitchen remodel photos and rough measurements to a consultation so a craftsman can confirm what’s buildable.
What is the new kitchen trend for 2026?
Warm minimalism: natural white oak and walnut, warmer neutral cabinets, slab and flat panel cabinets, statement stone and slab backsplashes, integrated storage, and quieter separation like broken-plan layouts. Trends inform. Your vision decides.
What is the most expensive part of redoing a kitchen?
Cabinets, typically near 40% of the total, followed by countertops and any work that relocates plumbing, gas, or electrical. Finish changes stay inside what’s already there. Layout changes mean demolition, structural review, permits, and new utility runs, which is why they carry more cost.
How many kitchen remodel photos should I bring to a consultation?
Ten to fifteen focused images beat a hundred loose ones. Pick the photos where you can name exactly what you want: the cabinets in one, the backsplash in another, the way a sink and window line up in a third. Clear inspiration moves faster than a full folder.
Bring Your Photos to Our Sacramento Showroom
Bring the folder. Come explore slabs, tile, flooring, and cabinet doors together under real light at 4815 Auburn Blvd, Sacramento, and we’ll tell you honestly what translates to your room. We serve Sacramento and nearby communities including Roseville, Folsom, Elk Grove, Citrus Heights, Carmichael, and Rocklin.
Ready to transform inspiration into a kitchen built around your life? Schedule a FREE Estimate or request a Free* No-Obligation Quote & Expert Advice. Call (916) 277-8282 or email design@capitalconstruction.com. We’re open Monday through Thursday 9 to 5 and Friday 9 to 4. CA Contractor License #793440.