A successful small kitchen remodel in Sacramento depends on maximizing the existing footprint through systematic space planning—such as vertical cabinetry, right-sized appliances, and strategic layouts like galley or L-shaped designs—while ensuring all structural changes and utility updates comply with 2026 California building codes and City permit requirements.
The best small kitchen remodel ideas start with layout, storage, and workflow before they ever touch finishes. Preserve clear walkways, take your cabinets vertical, right-size your appliances, layer your light, and use custom countertops and cabinets to turn awkward inches into useful space. A small kitchen doesn’t need more square footage first. It needs a clear purpose for every square inch you already have. If your kitchen feels cramped or awkward, that frustration is real, and it matters, because this is the room where your day starts and where your family gathers. The good news: with the right plan, a compact kitchen can still feel open, work beautifully, and reflect the way you actually live.
What Counts as a “Small Kitchen” and Why It Still Deserves a Real Remodel
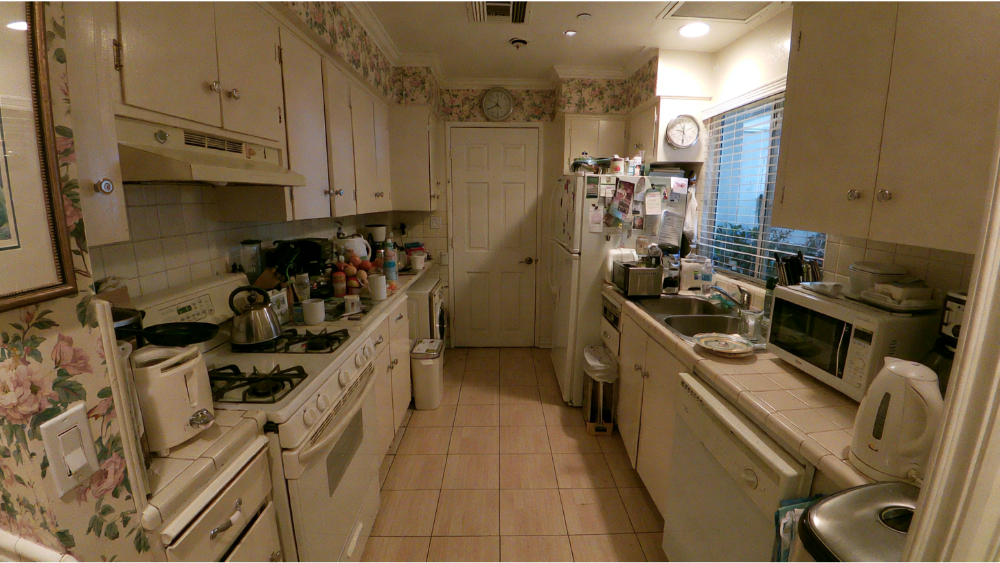
“Small” isn’t just a feeling you have when two people can’t pass each other by the stove. The National Kitchen & Bath Association plans storage for kitchens under 150 square feet, which means a small kitchen can be measured and planned as systematically as a larger space.
There’s a difference between organizing a kitchen and remodeling one. Bins, dividers, and a fresh coat of paint are organization fixes. They help, but they work around problems instead of solving them. A true remodel changes the layout, the cabinets, and the countertops so the entire room stops fighting you. Many of the strongest small kitchen remodel ideas never add a single square foot; they simply give every existing inch a job. A compact footprint can still become extraordinary and deeply personal. The size of the room sets the constraints. It doesn’t set the ceiling on what your kitchen can become.
Start With the Floor Space That Matters Most: Measure Before You Choose Finishes
Before you fall in love with a tile or a cabinet color, measure how you move through the room. This is the step most inspiration lists skip, and it’s the one that decides whether your remodel actually works. The prettiest idea is the wrong idea if it breaks the way you walk, reach, and cook.
NKBA gives clear benchmarks worth measuring against:
- General walkways: at least 36 inches of clear passage.
- Work aisles: at least 42 inches for one cook, 48 inches when two people cook together.
- Prep space at the sink: at least 36 inches wide by 24 inches deep of uninterrupted counter.
- Appliance door swings: map where the oven, dishwasher, and refrigerator doors land when open.
Not every small kitchen has room for every trend, and that’s fine. When you know your real numbers, you can choose design ideas that fit instead of forcing in features that leave you turning sideways to reach the sink. Measure the floor space first, then design. Everything after this is easier.
Choose the Right Layout Before Choosing Finishes

Layout is the foundation everything else sits on. A helpful benchmark is the classic work triangle connecting your sink, cooktop, and refrigerator: the three legs should total no more than 26 feet, with each leg between 4 and 9 feet, and major traffic shouldn’t cut through the middle. Treat it as a guide, not a rule, because well-planned work zones matter just as much in a compact kitchen design. Here’s how the common small-kitchen layouts compare.
The Galley Layout: Maximizing Counter Space in a Narrow Room
A galley kitchen runs two parallel cabinet runs down a narrow room, and it’s one of the most efficient layouts for small spaces. With countertops and appliances facing each other, prep, cooking, and cleanup happen in a tight, natural loop. The key number is the aisle between the two runs: keep it at least 42 inches for one cook, or 48 inches if two people share the space. Too narrow and the layout feels like a hallway. Get the aisle right and a galley delivers more usable counter space per square foot than almost any other plan, which is why it shows up so often in small kitchen ideas that actually work.
L-Shaped and U-Shaped Kitchens for Compact Footprints
An L-shaped kitchen wraps counters around a corner, which opens up the floor for easy flow and sometimes a small table or a couple of stools. It’s forgiving in compact rooms because it keeps one side fully open. A U-shaped kitchen wraps three walls, giving you the most storage space and counter frontage, but it needs breathing room between the opposing arms. If accessibility is a priority, plan for 60 inches of clearance between facing runs so a wheelchair can turn. In both layouts, corners are prime real estate, so specify a corner cabinet with a working storage device rather than a dark, unreachable void.
One-Wall Kitchens and When to Add a Peninsula
One-wall kitchens line every cabinet and appliance along a single wall, which you’ll often find in condos and older Sacramento-area homes. They’re clean and open, but they can leave you short on prep space. A peninsula solves that gracefully: it extends off the counter or a nearby wall to add work surface and casual seating without committing the full floor space a freestanding kitchen island demands. That makes it a smart middle ground for tight rooms, and it sets up the island-versus-peninsula decision we’ll get into later.
Should You Remove a Wall to Open Up the Kitchen?
Taking down a wall between the kitchen and an adjoining dining area or living space can bring in light and make a small kitchen breathe. Sometimes it’s the single best move you can make. But it comes with trade-offs. Removing a wall usually means losing the cabinets and countertops that lived on it, along with the wall space they occupied, and if the wall is load-bearing, you’re into structural work that affects both engineering and permits. We’ll cover Sacramento permit realities further down. The honest answer: open the wall when the gain in flow and light clearly outweighs the storage you give up, not just because open concept looks good in photos.
Take Storage Vertical With Built In Cabinets Without Making the Room Feel Heavy
When floor space is fixed, the ceiling is your best untapped storage. Extending cabinets all the way up eliminates the dust-collecting gap above standard upper cabinets and adds a full tier of built in storage for the things you reach for a few times a year. Tall cabinets and a pantry, plus cabinets over the refrigerator, pull the same trick, stacking function upward instead of outward and drawing the eye upward so the room reads taller.
NKBA suggests around 1,400 inches of shelf and drawer frontage for a small kitchen, which is a lot to fit into a compact footprint, and going vertical is how you get there. Keep the things you use daily between 15 and 48 inches off the floor, in the easy-reach zone, and send seldom-used items up high.
The worry with floor-to-ceiling cabinets is that they’ll make a small room feel boxed in. Two details keep that from happening: interior cabinet lighting, one of the fastest-rising features in NKBA’s 2026 trends at roughly 72 percent of respondents, and a few glass-front cabinet doors that let the eye travel through instead of hitting a solid wall. A run of built in storage, kept visually light, gives you capacity without the weight. This is the kind of tailored, functional cabinetry our in-house team is happiest creating.
Open Shelving and Floating Shelves: Better Than Upper Cabinets in a Small Kitchen?
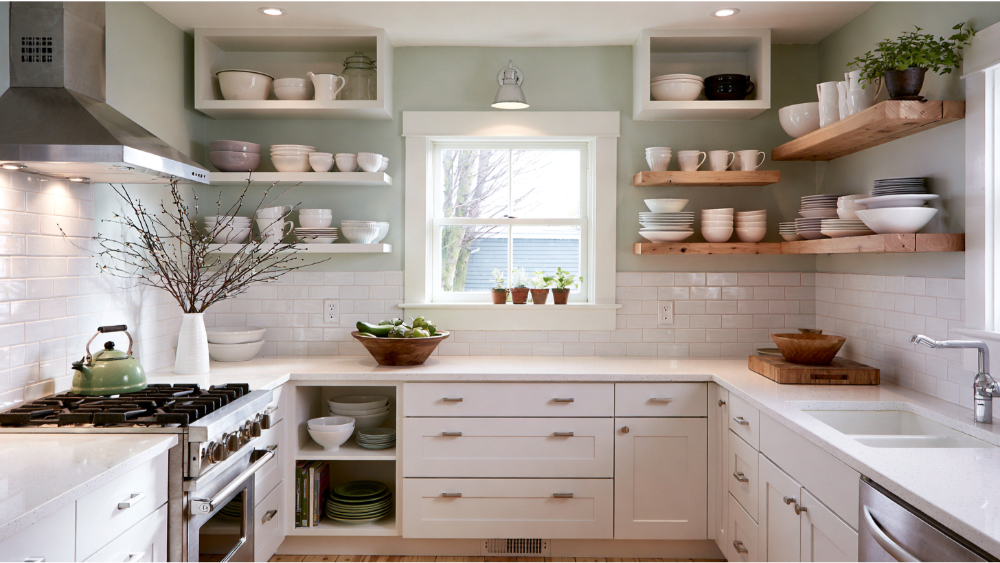
Open shelving and floating shelves make a small kitchen feel airier and keep your everyday plates and mugs within arm’s reach. But they cut your enclosed storage, and anything left on them is on display, so they read as clutter the moment they’re overloaded. The honest recommendation is to use open shelves selectively, one run or a single wall, balanced against closed cabinets that hide the less photogenic stuff. Floating shelves also give you a spot to lean a little decor, a cutting board or a small plant, without stealing counter space. Where you cook rather than store, wall-mounted racks and a pegboard put pots, pans, and tools in reach while freeing cabinet space below. Openness where it helps, cabinet doors where it counts.
Turn Cabinet “Dead Zones” Into Functional Storage
Every small kitchen has wasted space hiding in plain sight: deep lower cabinets where things vanish into the back, blind corners, and narrow gaps beside the range. Reclaiming those zones can add real capacity and functionality without changing the footprint at all.
- Deep drawer bases instead of standard lower cabinets, so pots and pans slide out to you instead of you crawling in after them.
- Pull-out organizers that bring the back of a deep cabinet forward with one motion.
- Drawer dividers to keep utensils, lids, and tools from becoming a jumble.
- Corner drawers or a lazy-Susan device, since NKBA recommends at least one corner cabinet include a functional storage mechanism.
- Pull-out trash and recycling tucked behind a cabinet door to keep bins off the floor.
- Toe-kick drawers under the base cabinets for flat items like baking sheets.
- Slim pull-outs that turn a narrow gap into spice or tray storage.
This is where custom cabinets earn their keep. Instead of buying stock boxes and hoping your things fit, our in-house team builds storage around how you actually cook, so the dead zones become the parts of the kitchen you rely on most. Creating new cabinets to your exact dimensions is how a compact room finally starts working with you.
Create More Usable Countertops in a Small Kitchen
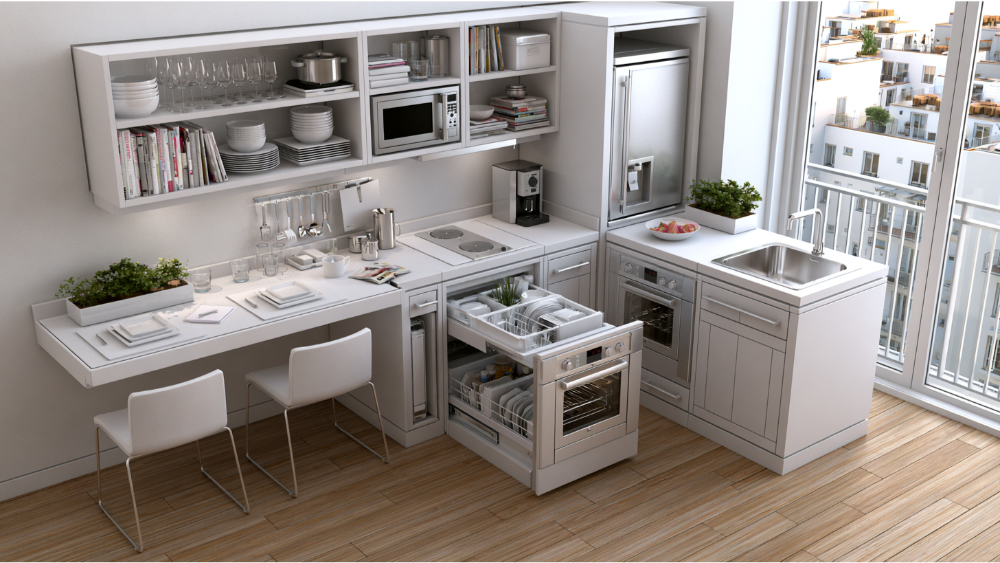
In a small kitchen, usable counter matters more than total square footage. Start by protecting one real prep zone next to the sink, at least 36 inches wide and 24 inches deep, kept clear at all times. NKBA also suggests landing space of 24 inches on one side of the sink and 18 on the other, plus an ideal total counter frontage around 158 inches. Treat that total as a target to aim for, not a promise every small kitchen can hit.
When dimensions get awkward, custom fabrication makes the difference. Our own countertop shop lets us fit slabs to odd corners and non-standard runs, so you gain surface where a stock top would leave a gap. Undermount sinks, cutting-board inserts, and a slide-out or fold-down counter extension all buy working space on demand. A dedicated coffee nook corrals the machine, mugs, and grounds so they stop eating into your prep area, giving your cooking essentials a perfect place to live. The one habit to break: parking every small appliance on the counter. Store the small appliances you don’t use daily and give the surface back to the work. Matching the countertops to your cabinets and decor keeps a small space feeling calm rather than cluttered.
Right-Size Your Appliances for the Way You Actually Cook
Appliances scaled to your kitchen and your habits free up more room than any single design trick. A counter-depth refrigerator sits nearly flush with the cabinets, keeping sightlines clean and walkways clear. A 24-inch dishwasher, a microwave built into a drawer or a wall run rather than the counter, and a choice between a range or a separate cooktop and wall oven all shape how the room flows. Integrated, built in appliances also give a small kitchen a sleek, modern look because their panels sit flush with the cabinet faces.
Placement follows the same measure-first logic. NKBA recommends 15 inches of landing space beside or across from the refrigerator within 48 inches, and 12 inches on one side of the cooktop with 15 on the other, so you always have somewhere to set a hot pan.
Don’t skip ventilation. The EPA notes that a range hood vented outdoors greatly reduces the pollutants you breathe while cooking and cites about 100 cfm as a typical target; NKBA recommends a ducted system with at least 150 cfm, and makeup air once you exceed 400 cfm. One safety note worth respecting: the NFPA reports cooking is the leading cause of home fires, which is another reason to keep proper landing space and to keep curtains and towels away from the burners.
Use Natural Light and Striking Light Fixtures to Make the Kitchen Work Larger
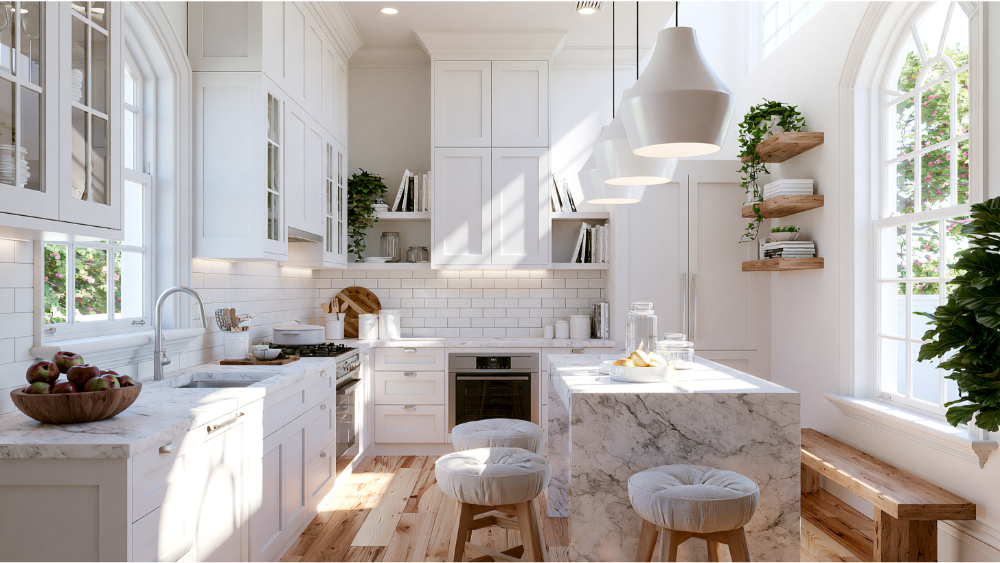
Good lighting makes a small kitchen work harder and feel bigger at the same time. Layer it. Under-cabinet task light, the most in-demand type in NKBA’s 2026 report at about 82 percent, erases the shadows you cast on your own prep space. Interior cabinet light, near 72 percent, lets you see into tall storage. Recessed ceiling fixtures give even general light without hanging into the room, and pendant lights, popular at roughly 63 percent, work over a peninsula or a compact kitchen island only where they won’t clutter your sightlines. Choose striking light fixtures with a slim, modern profile so they add function and a bit of visual interest without visually crowding the space. Pale light shades also help soften and spread the glow.
Pull in as much natural light as you can and let reflective surfaces bounce it around. Glossy cabinet faces and polished countertops reflect light and make all the difference, doing as much for the sense of openness as any square foot you could add. If your remodel touches the electrical, plan for efficient LED light fixtures. California’s 2025 Energy Code took effect January 1, 2026, and it favors energy-efficient lighting, so building it in from the start keeps you aligned without any afterthought retrofits.
Make a Small Kitchen Feel Larger With Light Colors and Visual Continuity
Color does quiet, powerful work in a small kitchen. Light colors and warm neutral palettes reflect more light and read as more open, while a high-gloss or satin finish adds a touch of dimension by catching that light and helping add light back into the room. Carrying a single color across the walls and cabinets, rather than breaking the room into contrasting blocks, lets your eye glide instead of stopping at every edge, which makes a small kitchen feel larger than its footprint. If you want a little personality, a single accent wall or a bold run of cabinet doors gives you that pop without darkening the whole room.
Continuity extends underfoot. Running the same flooring from the kitchen into an adjoining room erases the visual seam that makes a small space feel walled off. A patterned floor laid to run across the room can even suggest more width. If your style leans bolder, a full-height backsplash or a single slab behind the range gives you a clean, uninterrupted, modern surface that reads bigger than tile broken up by grout lines. Keep hardware simple and the clean lines sleek, and the whole room settles into a calm, airy feel and a genuine open feel.
Use Natural Light and Striking Light Fixtures to Make the Kitchen Work Larger
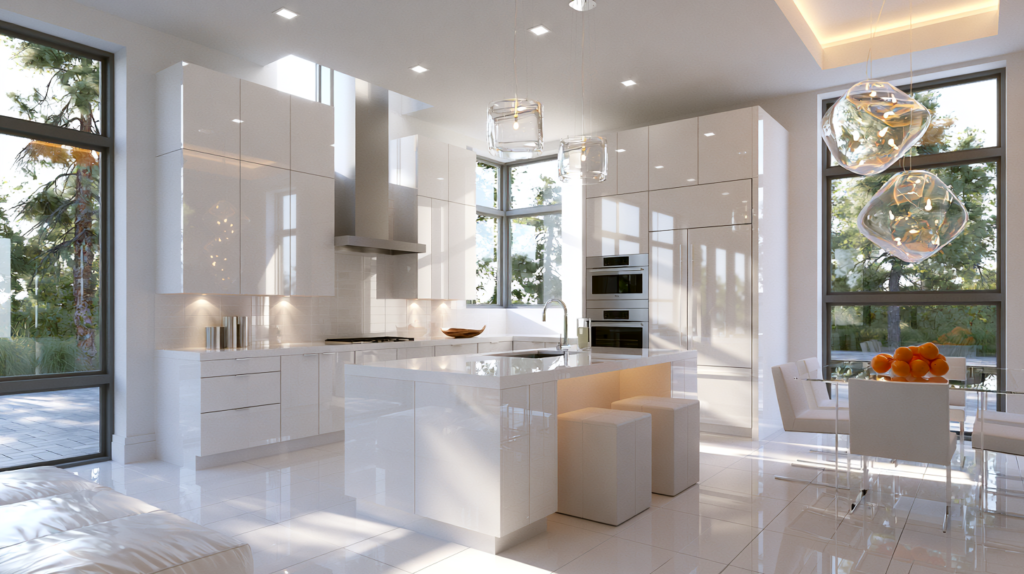
A fixed kitchen island is the feature people ask for most and the one that fails most often in a small kitchen. The math is unforgiving. NKBA recommends 32 inches of clearance behind a seated diner where no one passes, 36 inches where someone squeezes by, and 44 inches for a clear walking path, plus 60 inches for wheelchair passage. Each seat needs about 24 inches of width. Drop a full kitchen island into a compact room and you quickly break the 42-inch work aisle you worked so hard to protect.
That’s why small kitchens often do better with a peninsula, a built in banquette, or a rolling island you can wheel out of the way. A peninsula adds seating along one open edge without eating into circulation. A banquette tucks into a corner and stores things under the bench, a smart bit of built in storage in a room that has none to spare. A movable table or rolling island comes in for prep and rolls out when you need floor space. Design for how you actually move, not for the island in the showroom photo.
What Sacramento-Area Homeowners Should Check Before Remodeling
Once your design is set, the practical rules matter. The City of Sacramento requires a building permit for remodeling and for work on electrical, mechanical, or plumbing systems, and starting before the permit is issued brings a penalty fee. The city also separates simple, non-structural kitchen remodels from projects that remove walls, add walls, open load-bearing walls, or change the floor plan, which fall under the broader residential remodel guidance.
Timing matters too. California’s 2025 Title 24 Building Standards Code took effect January 1, 2026, so your project should be planned against the current code, not the previous cycle. On the contractor side, the CSLB requires a licensed contractor for work that needs a permit, uses employees, or totals $1,000 or more, and a written contract for any home improvement project over $500. Capital Construction is a licensed general contractor, CA Contractor License #793440, so the permit and contract side is handled correctly from the first conversation.
How Capital Construction Turns a Tiny Kitchen Into a Big Impact
We’re a family-owned contractor proudly rooted in Sacramento, and we treat your kitchen the way we’d treat our own: as the heart of the home, worth getting right down to the inch. Our whole team is in-house. We don’t outsource your project to third parties, which means the people who plan your remodel are the same people accountable for building it.
That accountability shows up in the details this article is about. Our showroom lets you handle materials and see finishes in person before you commit, so your vision and the final result match. Whether you’re weighing light colors against a bold accent wall, comparing cabinet doors, or picking the countertops that tie the space together, you can see it all in one place. Our own countertop fabrication shop means we can cut surfaces to fit the awkward corners and odd runs that small kitchens are full of, and our team enjoys creating cabinets and built in storage that solve the exact problems your room has. Small changes to a tiny kitchen can completely transform how it works day to day, and the right combination of modern functionality and craftsmanship makes a big impact on even the smaller footprint. Whether it’s a targeted update or a full renovation, we work with transparent communication and upfront timelines and costs, so the process feels calm instead of chaotic.
If your small kitchen is ready to work harder and feel bigger, Schedule a FREE Estimate. Request a Free* No-Obligation Quote & Expert Advice at (916) 277-8282 or design@capitalconstruction.com. You’ll find us at 4815 Auburn Blvd, Sacramento, CA 95841.
Frequently Asked Questions
What is the best layout for a small kitchen remodel?
It depends on your room’s shape, but galley and L-shaped layouts tend to work best in compact spaces. A galley maximizes counter space in a narrow room, while an L-shape opens a corner for flow. The right choice comes down to your measurements and how you cook.
Can I add a kitchen island to a small kitchen?
Often a peninsula or rolling island works better. A fixed kitchen island needs enough clearance to keep at least a 42-inch work aisle and room behind any seating, and in most small kitchens an island eats into that space. A peninsula adds prep and seating without breaking your walkways.
How do I maximize storage in a small kitchen?
Go vertical with ceiling-height cabinets, and reclaim dead zones with deep drawers, pull-out organizers, and corner storage devices to maximize every inch. NKBA suggests around 1,400 inches of shelf and drawer frontage for a small kitchen, and custom cabinets are how you fit that into a compact footprint.
What colors make a small kitchen look bigger?
Light colors and warm neutral palettes reflect the most light and read as more open, especially when you carry one color across walls and cabinets. A gloss or satin finish adds subtle dimension, and continuous flooring into the next room removes the visual boundary that makes a space feel closed in.
Do I need a permit for a small kitchen remodel in Sacramento?
Usually, yes. The City of Sacramento requires a building permit for remodeling and for electrical, mechanical, or plumbing work, and structural or floor-plan changes trigger additional review. A licensed contractor like Capital Construction handles the permit process as part of your project.