A Complete Guide for Homeowners

Flooring installation may look simple at first glance, but achieving a professional result requires the right tools, proper preparation, and experience with different flooring materials. Homeowners often see the finished floor but rarely see the specialized tools used during the installation process. Understanding what tools are used in professional flooring installation helps explain why expert craftsmanship makes all the difference in durability and appearance.
Professional flooring professionals rely on a wide range of measuring tools, cutting tools, layout tools, and finishing tools. These tools ensure precision, allow installers to work efficiently, and help avoid problems such as adhesive failure, uneven seams, or gaps between planks. When the right equipment is used during flooring installation, the result is a clean, secure floor that performs well for years.
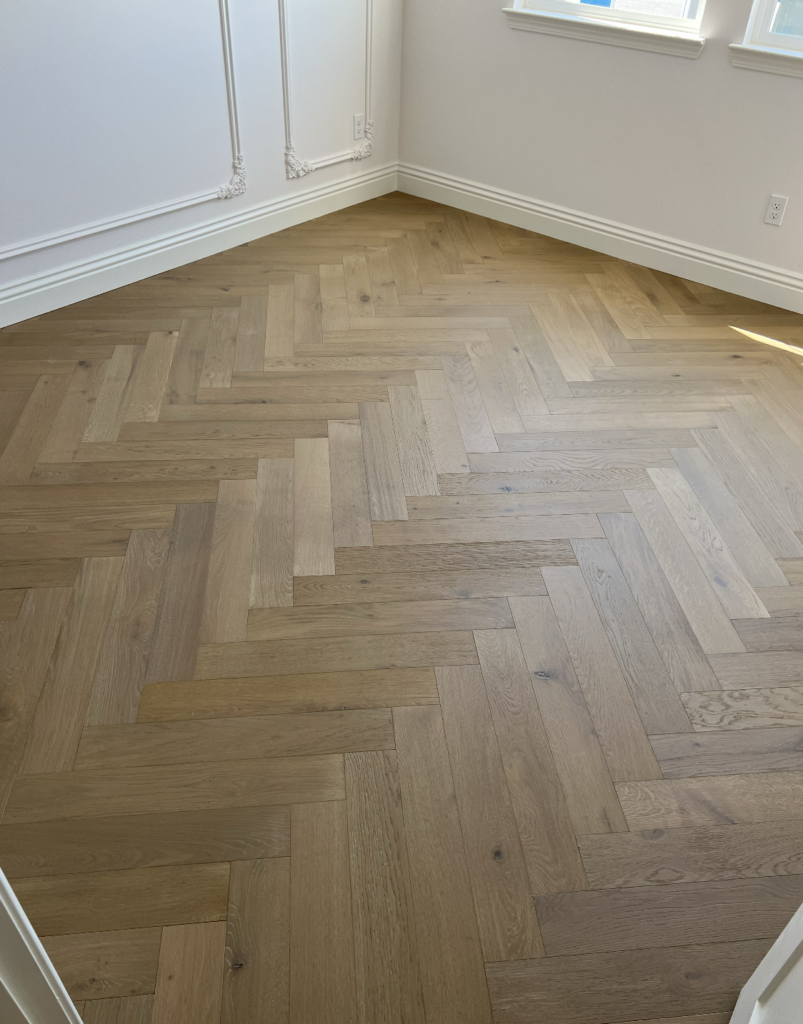
Whether a flooring project involves hardwood flooring, laminate flooring, engineered hardwood, or tile installations, every flooring type requires a unique combination of tools. Each tool supports a specific stage of the installation process, from measuring room dimensions to making precise cuts and securing boards into place. With the right equipment and knowledge, flooring professionals can install new flooring with a snug fit and a flawless finish.
Why Professional Flooring Installation Requires Specialized Tools
Flooring installation involves far more than laying planks or tiles across a room. Every flooring project requires proper preparation, careful planning, and the use of specialized tools. Flooring professionals understand how different flooring materials behave and which tools are required for each installation.
The right tools ensure precision and accuracy. During hardwood flooring installation, even small measurement errors can cause misaligned boards or gaps that affect the entire floor. Accurate measurements with measuring tools like a tape measure or measuring tape help installers plan the layout before the first plank is placed.
Another reason the right tools are necessary is to protect the flooring materials themselves. Hardwood flooring, laminate flooring, and engineered hardwood all respond differently to humidity and wood movement. Moisture meters help installers detect moisture levels in the subfloor and surrounding environment before hardwood installation begins.
Using specialized tools also helps flooring professionals complete long installs efficiently while maintaining quality. Power tools such as a circular saw, table saw, and miter saws help installers cut materials quickly while maintaining straight lines and precise cuts. The right equipment improves speed without sacrificing accuracy.
In short, flooring installation requires much more than a hammer and nails. The installation process depends on essential tools, key tools, and the experience to use them properly.
Essential Measurement and Layout Tools

Every successful flooring installation starts with accurate measurements and careful layout planning. Measuring tools and layout tools help installers establish straight lines and plan how flooring materials will fit throughout the room.
Tape Measures and Laser Measuring Devices
A tape measure is one of the most important measuring tools on any flooring project. Flooring professionals use a tape measure repeatedly to confirm room dimensions, spacing between boards, and placement around walls or door jambs. A measuring tape helps ensure accurate measurements before the installation process begins.
Accurate measurements are essential when calculating how much flooring material is required. They also help installers determine how the flooring layout will flow through large rooms or irregular spaces.
Chalk Line and Layout Tools
A chalk line is used to mark straight lines across the floor surface. These straight lines guide installers as they place the first row of flooring. Without a chalk line, rows could gradually shift, causing crooked lines across the room.
Layout tools like a chalk line make it easier to maintain alignment during the entire flooring installation. Straight lines help ensure a professional result and prevent uneven seams.
Moisture Meters
Moisture meters are equally important measuring tools for hardwood flooring projects. These tools detect moisture in the subfloor or surrounding environment before hardwood installation begins.
Excess moisture can lead to wood movement, cupping, or warping in hardwood flooring. Moisture meters help installers verify that conditions are suitable before they install hardwood flooring.
Subfloor Preparation Tools Professionals Use
Proper preparation of the subfloor is critical before installing new flooring. Prep work ensures the floor surface is smooth, stable, and free of debris that could affect the installation process.
Removing Old Flooring
The first step in many flooring projects is removing old flooring materials. A pry bar is often used to lift old boards, trim pieces, or tack strips. A pry bar allows installers to carefully remove old flooring without damaging the underlying subfloor.
When stubborn materials remain, installers may also use additional power tools to loosen adhesives or nails embedded in the surface.
Addressing Uneven Subfloors
An uneven subfloor can cause serious problems during flooring installation. Installers inspect the floor surface carefully and repair low or high areas before installing new flooring materials.
Power tools such as grinders or sanders may be used to smooth rough areas. Proper preparation prevents squeaks, gaps, or movement after the flooring installation is complete.
Cleaning the Surface
Cleaning supplies and debris removal tools are equally important during prep work. A shop vacuum removes dust, nails, and debris left behind after removing old flooring.
Using a shop vacuum ensures adhesives bond properly and prevents particles from interfering with the installation process. Clean surfaces help prevent adhesive failure and ensure flooring materials sit flat against the subfloor.
Cutting Tools Used in Flooring Installation

Cutting tools allow installers to shape flooring materials to fit around walls, cabinets, and obstacles. Making precise cuts is essential for achieving a tight fit and a professional result.
Utility Knife for Vinyl and Carpet
A utility knife is one of the most versatile flooring tools. Installers often use a utility knife when cutting vinyl flooring, trimming carpet edges, or shaping underlayment.
A utility knife with replaceable blades allows installers to maintain sharp edges during long installs. Replaceable blades help ensure precise cuts and reduce the risk of tearing flooring materials.
Circular Saw and Miter Saws
Power tools such as a circular saw and miter saws are essential when working with hardwood flooring or laminate flooring. A circular saw is commonly used for long straight cuts, while miter saws help create angled cuts or crosscuts.
These cutting tools allow installers to make precise cuts that keep plank seams tight and aligned.
Table Saw for Rip Cuts
A table saw is often used when boards need to be trimmed lengthwise. Rip cuts are necessary when fitting boards along walls or tight areas.
Using a table saw helps maintain straight edges and ensures a snug fit against walls or cabinetry.
Tools for Intricate Cuts
In some situations installers must make intricate cuts around vents, pipes, or door jambs. Specialized cutting tools allow installers to shape flooring pieces so they fit neatly around obstacles.
Hardwood Flooring Installation Tools
Hardwood flooring installation requires several specialized tools designed specifically for securing wood planks.
Flooring Nailer or Stapler
A flooring nailer or stapler is one of the most important tools used to install hardwood flooring. A flooring nailer drives fasteners through the tongue of each board to secure it to the subfloor.
Many contractors use pneumatic nailers connected to an air compressor. Pneumatic nailers allow installers to fasten boards quickly and consistently during hardwood floor installation.
Using a flooring nailer helps create a secure nail down installation and ensures boards remain stable over time.
Rubber Mallet and Tapping Block
A tapping block protects the edges of hardwood boards when installers are tapping planks into place. A rubber mallet is used together with a tapping block to gently tap boards until they achieve a tight fit.
The tapping block distributes force evenly so the plank edges are not damaged. When tapping planks together correctly, installers achieve a snug fit between boards.
Pull Bar for Final Rows
A pull bar is another essential tool during hardwood installation. Installers use a pull bar when installing boards near walls where a flooring nailer cannot reach.
The pull bar allows installers to pull boards tightly together without damaging the wood surface.
Tools Used for Engineered Hardwood
Engineered hardwood may be installed using nail down, glue down, or floating floors methods. Depending on the installation method, installers may use a flooring nailer, tapping block, pull bar, and rubber mallet.
Each flooring type requires slightly different techniques, but these tools ensure the boards fit tightly together and remain stable.
Tools for Laminate and Vinyl Flooring
Laminate flooring and vinyl flooring often use click lock systems that require specific tools during installation.
Utility Knife for Cutting Vinyl
When cutting vinyl flooring or trimming laminate boards, installers frequently rely on a utility knife. Cutting vinyl with a sharp blade produces clean edges and prevents tearing.
Tapping Block and Rubber Mallet
A tapping block and rubber mallet are commonly used when installing laminate flooring or floating floors. The tapping block protects plank edges while installers tap boards into place.
Pull Bar for Tight Areas
Just like hardwood installation, laminate flooring often requires a pull bar for the final rows near walls.
Flooring Roller for Adhesive Installations
Some vinyl flooring products use glue down installation methods. A flooring roller presses the flooring materials into adhesive to ensure proper bonding and prevent air pockets.
Using a flooring roller helps avoid adhesive failure and ensures the material adheres evenly across the surface.
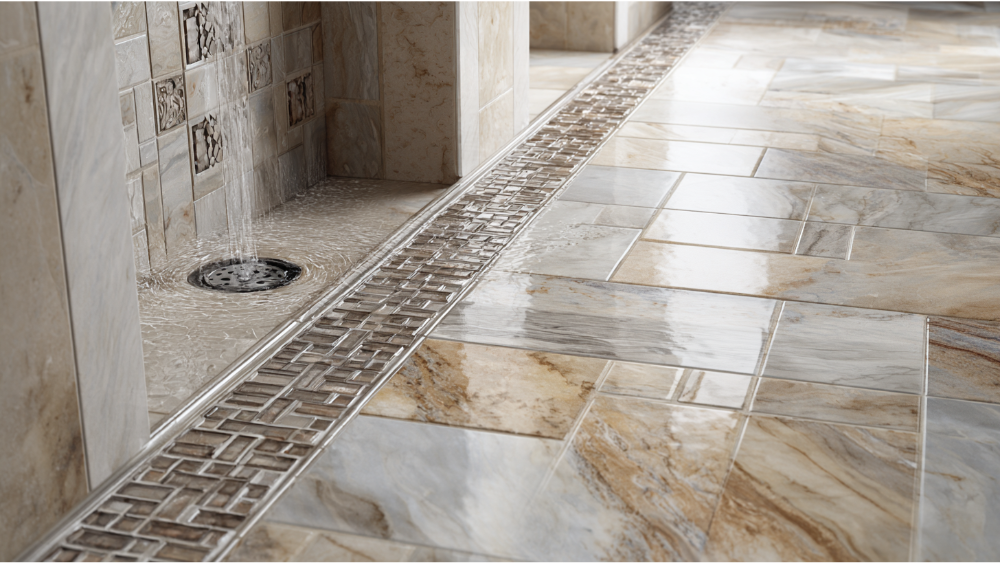
Tile Flooring Installation Tools
Tile installations require their own set of tools because the materials and adhesives are different from wood or laminate flooring.
Installers use specialized cutting tools to shape tiles and achieve precise cuts. Mortar application tools help spread adhesive evenly across the surface.
During tile installations, leveling systems and spacing tools help maintain straight lines and consistent grout joints.
Finishing Tools That Create a Professional Look
Finishing tools are used during the final stage of the flooring installation. These tools help create a polished appearance and ensure transitions between rooms look seamless.
Installers may use trimming tools, caulking equipment, and other finishing tools to complete edges and transitions around door jambs or thresholds.
These finishing tools contribute to a flawless finish that enhances the appearance of the entire room.
Safety Equipment Used by Professional Flooring Installers
Safety tools are an important part of any flooring project. Installers work with power tools, cutting tools, and heavy materials, so proper safety equipment is essential.
Safety glasses protect eyes from debris when using power tools. Knee pads protect installers during long installs that require extended kneeling. Knee pads are one of the most frequently used safety tools on a flooring job site.
Knee pads reduce strain and allow installers to work comfortably for extended periods. Because flooring installation involves constant kneeling, knee pads are critical for safety and comfort.
Why Hiring Professional Flooring Contractors Matters
Hiring experienced flooring professionals ensures the right tools and techniques are used for each flooring type. Professional installers understand which key tools are required and how to use them efficiently.
A flooring project completed with the right tools ensures precise cuts, straight lines, and a snug fit between boards. These tools ensure precision and help installers deliver a professional result every time.
Professionals also have access to all the tools required for hardwood flooring installation, laminate flooring, tile installations, and other flooring types. Having access to all the tools allows contractors to complete the installation process efficiently.
Flooring Installation Considerations for Sacramento Homes
Sacramento homeowners often choose flooring materials based on durability, style, and performance. Hardwood flooring remains one of the most popular choices because it adds warmth and value to a home.
However, proper hardwood floor installation is critical. Wood movement caused by seasonal humidity changes must be considered during hardwood installation. Moisture meters and proper spacing help accommodate wood movement and protect the floor.
Laminate flooring and engineered hardwood are also popular options for Sacramento homes. These flooring materials provide durability while maintaining the appearance of natural wood.
Frequently Asked Questions (FAQs)
What tools are used in professional flooring installation?
Professional flooring installation involves a variety of tools including measuring tools (tape measure, chalk line), cutting tools (utility knife, circular saw, miter saws, table saw), fastening tools (flooring nailer or stapler, pneumatic nailers), and finishing tools (tapping block, pull bar, rubber mallet). Specialized tools vary depending on the flooring type such as flooring rollers for vinyl and tile cutters for ceramic tiles.
Why are moisture meters important in hardwood floor installation?
Moisture meters are essential for detecting moisture levels in the subfloor and surrounding environment. Excess moisture can cause wood movement, cupping, or adhesive failure, leading to damage after installation. Using moisture meters helps ensure that the flooring materials are installed under optimal conditions to prevent future issues.
What safety equipment should flooring installers use?
Flooring installers should use safety glasses that meet ANSI standards, knee pads to protect knees during long installs, dust masks or respirators to guard against wood dust and adhesive fumes, heavy gloves for hand protection, and hearing protection when using power tools. These safety tools help prevent injuries and ensure comfort during the installation process.
How do specialized tools improve the flooring installation process?
Specialized tools like flooring nailers, tapping blocks, pull bars, and flooring rollers enable installers to work efficiently and achieve precise, snug fits between flooring materials. These tools minimize damage to the flooring, reduce installation time, and help deliver a professional, flawless finish.
Can digital tools support flooring professionals during installation projects?
Yes, digital tools assist flooring professionals by managing scheduling, estimating, inventory tracking, and communication. These tools provide real-time visibility into project progress, help prevent material shortages, and streamline business operations, complementing the physical tools used on the jobsite.
Final Thoughts: The Right Tools Make All the Difference
Understanding what tools are used in professional flooring installation helps homeowners appreciate the skill involved in the process. Flooring professionals rely on essential tools, measuring tools, cutting tools, and power tools to ensure each flooring project is completed correctly.
The right tools ensure precision, improve efficiency, and help installers achieve a professional result. From measuring room dimensions to tapping planks into place with a tapping block and rubber mallet, every tool plays a role in the installation process.
With the right equipment, proper preparation, and experienced installers, new flooring can deliver lasting beauty and performance. Professional flooring installation combines knowledge, craftsmanship, and the right tools to create a floor that looks great and performs well for years.