Flooring Replacement Planning Checklist
A successful flooring replacement starts with a clear plan, not just a product choice. This flooring replacement planning checklist is designed to help Sacramento homeowners prepare every detail before installation begins, so the entire flooring project runs smoothly from start to finish. At Capital Construction, we approach every flooring installation with a structured project checklist that prioritizes durability, performance, and a stress-free experience. Whether you are upgrading one room or completing a full renovation project, the right preparation ensures your new flooring is installed correctly and built to last. This flooring replacement planning checklist also helps homeowners understand what to expect before installers arrive and how to prepare each space for a smooth installation process.
Why You Need a Flooring Replacement Plan Before You Start

Every flooring project benefits from a clear project plan. Without proper planning, issues like uneven subfloor conditions, poor moisture content control, and mismatched transitions can lead to costly corrections. A detailed flooring installation checklist helps homeowners determine the right materials, timeline, and expectations before installation begins. Planning also ensures your new flooring works across living areas, kitchens, and bathroom spaces without disruption. When installation begins with a defined checklist, the process becomes more efficient, predictable, and professional.
Step 1 – Define Your Project Scope and Goals
Which Areas Are You Replacing Flooring In?
The first step in any flooring replacement planning checklist is to determine the scope of your project. Decide if you are updating a single room, multiple rooms, or the entire home. Many Sacramento homeowners choose to update flooring in living areas, hallways, closets, and bedrooms at the same time to create a cohesive look. This stage helps create a clear project checklist and allows your installation team to plan transitions between each room and space.
What Are Your Performance Needs?
Different flooring types serve different purposes. High traffic areas require durable materials, while bathroom environments need moisture resistance. Consider how each room will be used, especially if you have pets, children, or heavy daily use. Choosing the right new flooring at this stage reduces long term maintenance and improves performance.
Are You Combining This With a Remodel?
Flooring installation is often part of a larger renovation project. If you are remodeling a kitchen or bathroom, it is more efficient to complete flooring installation during the same timeline. This approach allows the installation team to coordinate around cabinets, appliances, and fixtures for a seamless result.
Step 2 – Evaluate Your Existing Floors and Subfloor
Identify Your Current Flooring Type
Understanding your existing flooring helps determine how the installation process will begin. Removing tile, laminate, carpet, or hardwood each requires different tools and preparation. This step ensures your installers arrive prepared with the right tools and equipment.
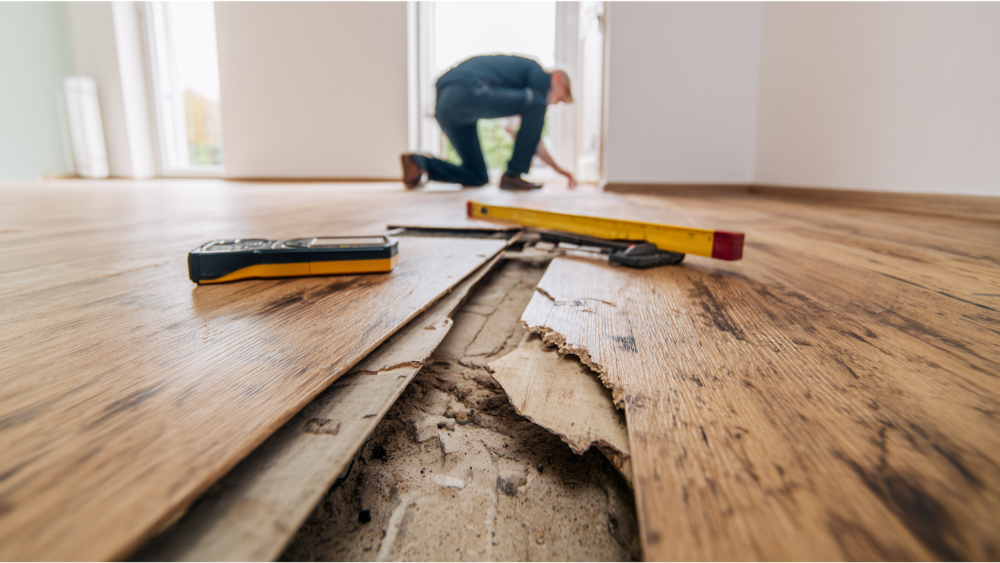
Inspect the Subfloor Condition
The subfloor is one of the most important parts of your flooring installation. It must be level, stable, and secure before new flooring installation begins. Any damage, squeaks, or uneven areas must be addressed during the pre-project phase. A properly prepared subfloor ensures your new flooring is installed evenly and performs well over time.
Check for Moisture or Water Damage
Moisture content and humidity levels must be evaluated before installation begins. This is especially important in kitchens, bathrooms, and entryways. Ignoring moisture issues can cause flooring to warp or fail after installation. A professional flooring installation checklist always includes moisture testing and inspection.
Step 3 – Consider Health, Safety, and Home Age Factors
Pre-1978 Homes and Lead Paint Considerations
Older homes require additional due diligence before a flooring project begins. If your home was built before 1978, demolition may require lead-safe practices. This protects both the homeowner and installation team during the process.
Older Flooring Materials and Asbestos Risk
Certain older flooring materials may contain asbestos. A professional inspection ensures safe removal before new flooring installation begins.
Indoor Air Quality and Material Safety
Indoor air quality is an important consideration when selecting flooring. Many homeowners now prioritize low emission materials that meet modern standards. Choosing the right flooring manufacturer ensures your new flooring supports a healthy indoor environment.
Step 4 – Choose the Right Flooring Material

Hardwood Flooring
Hardwood flooring remains a popular option for its durability and timeless appearance. Hardwood performs well in living areas and bedrooms when properly installed and maintained.
Luxury Vinyl Plank (LVP/LVT)
Luxury vinyl is one of the most versatile flooring types. It offers water resistance, durability, and easy maintenance, making it ideal for high traffic areas and busy households.
Laminate Flooring
Laminate flooring provides a cost-effective solution with a wide range of styles. Laminate works well in moderate traffic rooms and delivers strong visual appeal.
Tile Flooring
Tile flooring is ideal for bathroom and kitchen environments due to its resistance to moisture and long-term durability.
How to Compare Materials Effectively
Compare flooring types based on durability, maintenance, and long-term value. Visiting a showroom allows you to see how different flooring options will look in your space before installation begins.
Step 5 – Plan for Installation Requirements
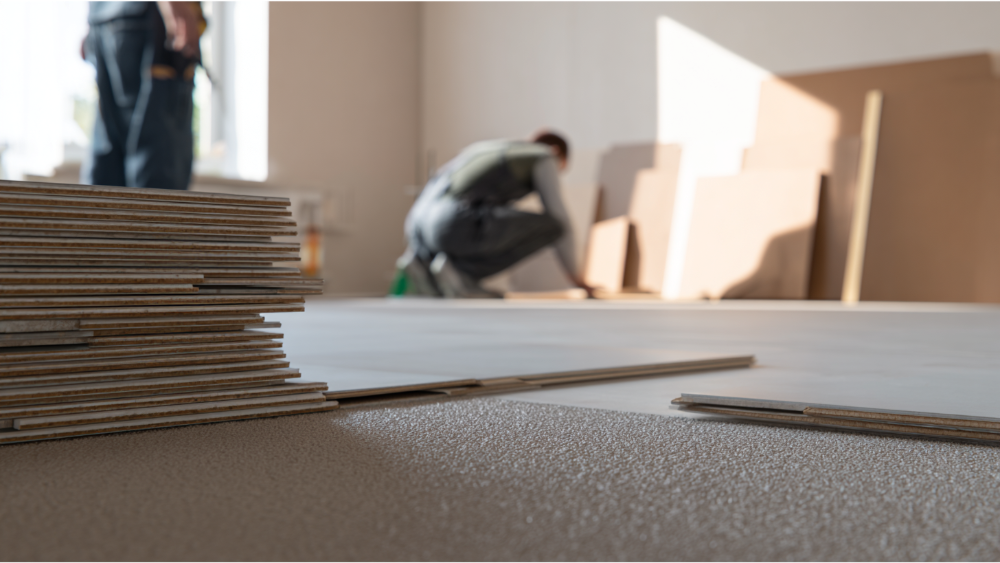
Underlayment and Preparation Needs
Proper preparation is essential for successful flooring installation. Underlayment helps manage moisture, sound, and comfort. The installation team will determine the best materials based on your flooring type.
Floor Height and Transitions
Floor height differences between rooms must be addressed during the planning stage. Proper transitions ensure smooth movement between rooms and prevent issues with doors and walls.
Baseboards, Trim, and Finishing Details
Finishing details like baseboards and trim play a key role in the final appearance. Decide whether to reuse or replace these elements before installation begins.
Step 6 – Set a Realistic Budget

Cost Factors to Consider
The total cost of a flooring project includes materials, labor, demolition, and installation. Each component should be clearly outlined in your project checklist.
Hidden Costs Homeowners Often Miss
Subfloor repairs, moisture mitigation, and finishing work can add to the overall project cost. Planning for these factors ensures a smoother process.
Value vs. Price: Making Smart Investments
Choosing high-quality flooring materials often leads to better long-term performance. Investing in professional installation helps protect that investment.
Step 7 – Create a Project Timeline
Typical Flooring Project Timeline
A well-structured project plan includes material selection, ordering, and installation schedule. This helps ensure the installation process stays on track from start to finish.
Factors That Can Cause Delays
Delays can occur due to material availability, subfloor repairs, or scheduling conflicts. Working with experienced installers helps minimize disruptions and keeps expectations aligned.
Step 8 – Choose the Right Contractor in Sacramento

Verify Licensing and Experience
Hiring a professional contractor ensures your flooring installation meets California standards. Experience with different flooring types and renovation projects is essential for quality results.
Ask the Right Questions
Before installation begins, ask about the timeline, installation team, and communication process. Clear expectations lead to better results.
Why Local Experience Matters
A local contractor understands Sacramento homes and climate conditions. This knowledge helps determine the best flooring solutions for your project and ensures proper installation.
Step 9 – Prepare Your Home Before Installation Day
Moving Furniture and Protecting Belongings
Pre-project, remove furniture from each room before installers arrive. Remove furniture, electronics, window treatments, and other items to create a clear workspace. This step helps the installation team work efficiently and reduces the risk of damage.
Preparing Pets and Family Members
Pets should be secured in a separate area during installation. Noise, dust, and activity can be disruptive, so planning ahead helps maintain safety and comfort.
What to Expect During Installation
Once installation begins, expect some noise, dust, and limited access to certain rooms. Installers will use tools and materials throughout the space, and debris will be managed as part of the process.
Additional Preparation Checklist
- Draw blinds and secure window treatments to reduce sunlight exposure during installation
- Double-check that doors, closets, and garage access points are clear for installers
- Remove appliances when necessary, including removing the oven for kitchen flooring installation
- Prepare walls, cabinets, and fixtures to avoid interference during installation
- Remove carpet, furniture, and other items before installers arrive to keep the process efficient
Step 10 – Final Walkthrough and Post-Installation Checklist

Inspecting Work Quality
After installation is complete, review the flooring carefully. Check alignment, transitions, and overall finish quality. A thorough project checklist ensures everything meets expectations.
Understanding Warranty and Care Instructions
Ask your contractor about warranty coverage and maintenance requirements. Proper care helps maintain your new flooring over time.
Maintenance Tips for Long-Term Performance
Use area rugs in high traffic areas to protect flooring. Maintain consistent temperature and humidity levels to preserve material integrity. Regular cleaning helps keep your flooring looking new and installed correctly.
Post Project Considerations
After the post-project phase, return furniture and other items to each room carefully. Allow proper acclimation times if recommended by the flooring manufacturer. Maintain the flooring according to professional guidelines for best results and long-term durability.
Common Flooring Replacement Mistakes to Avoid
- Skipping subfloor inspection can lead to uneven installation.
- Choosing flooring based only on appearance can result in poor performance.
- Ignoring moisture content and humidity levels often causes long-term issues.
- Hiring unlicensed installers increases risk.
- Failing to prepare properly before installation begins can delay the entire project and impact results.
Flooring Trends Sacramento Homeowners Are Choosing in 2025

Homeowners are selecting flooring that balances style and durability. Wide plank hardwood flooring, modern laminate, tile, and waterproof flooring options are popular choices. These trends reflect a focus on long-lasting materials that perform well in everyday use across multiple rooms and living areas.
FAQs – Flooring Replacement Planning Checklist
How do I know if I need to replace or repair my flooring?
If your flooring shows structural damage, wear, or moisture issues, replacement is often the best option for long-term performance.
What is the best flooring for Sacramento homes?
Luxury vinyl, hardwood flooring, laminate, tile, and carpet are all strong options depending on the room and usage.
How long does flooring installation take?
Most flooring installation projects take several days, depending on the size of the space, number of rooms, and complexity of the installation process.
Do I need permits to replace flooring in California?
Most flooring replacement projects do not require permits unless structural changes are involved in the renovation project.
Can flooring be installed during a kitchen or bathroom remodel?
Yes, combining flooring installation with a remodel improves efficiency and overall results while keeping the project on schedule.
How much does flooring replacement cost in 2025?
Costs vary based on materials, room size, and project scope. A professional estimate helps determine accurate pricing.
Start Your Flooring Project With Confidence
A successful flooring project begins with a clear flooring installation checklist and a well-defined plan. By following this flooring replacement planning checklist, homeowners can prepare every detail before installation begins and avoid unnecessary setbacks. At Capital Construction, we deliver professional flooring services designed to create a smooth, stress-free experience from start to finish. Our experienced installers and dedicated installation team ensure every detail is handled with precision, from preparation to final walkthrough. If you are ready to upgrade your home with new flooring, contact our team today to schedule your consultation and take the next step toward a complete transformation.